
Methods to Detect Leaks in Mains Water Supply Lines: Complete UK Guide
Right, let's talk about finding leaks in mains water supply pipes. After thirty years pointing detection equipment at underground pipes across Cornwall and Devon, I can tell you this: the methods have transformed from destructive guesswork to surgical precision. That mysterious wet patch in your garden? Could be wasting 200,000 litres yearly. Here's exactly how we detect leaks in mains water supply lines without digging up half your property.
Modern methods to detect leaks in mains water supply lines include acoustic leak detection (using sound waves to pinpoint escapes), tracer gas detection (injecting safe gas mixtures to track underground leaks), thermal imaging (spotting temperature differences from escaping water), and pressure testing (measuring drops to confirm leaks). Combined with visual inspection and water meter analysis, these non-invasive techniques locate water leaks in main pipe supply systems accurately—typically within 30cm—saving thousands in unnecessary excavation costs whilst protecting your property from damage.
Quick Summary: Best Detection Methods by Situation
- Suspected mains leak but location unknown: Start with water meter test, then professional acoustic leak detection
- Underground mains pipe under driveway/patio: Tracer gas detection (works through concrete and tarmac)
- Shallow buried pipes or slab leaks: Thermal imaging cameras to spot temperature changes
- Confirming leak presence: Pressure testing water pipes between external stop valve and internal stopcock
- Long pipe runs (50m+): Acoustic correlation equipment to triangulate leak position
- Post-repair verification: Follow-up pressure test to ensure fix worked
Understanding Your Mains Water Supply System
Before we dive into detection methods, you need to understand what we're actually looking at. Your mains water supply isn't just one pipe—it's a system with clear responsibility boundaries that affect who pays for what.
In the UK, your water supply company owns and maintains the water main in the street. From there, a communication pipe runs to your property boundary (usually marked by your external stop valve). This bit's their responsibility. From the external stop valve to your internal stopcock—that's your supply pipe, and it's your responsibility.
This matters because water leaks between your meter and house on your side of the boundary mean you're paying for wasted water. On their side? Not your bill, but still worth reporting. I've investigated properties losing £300 quarterly from leaks they thought the water company should fix.
Common Mains Supply Materials in Cornwall & Devon
Detection methods vary by pipe material. Victorian properties often have lead pipes (banned since 1970 but still in ground). Post-war developments typically use iron or early copper. Modern replacements are blue MDPE plastic.
Lead pipes are particularly troublesome—they corrode from inside out, creating pinhole leaks that are nightmare to find without specialist equipment. Iron pipes develop rust spots. Plastic rarely fails unless damaged during groundwork.
Initial DIY Tests Before Calling Professionals
Before spending money on professional leak detection services, there are two tests every homeowner should try. These confirm whether you actually have a leak and roughly where it might be.
The Water Meter Leak Test
This is your first port of call and it's completely free. Here's exactly how to conduct a proper water meter leak test:
Step-by-Step Water Meter Test
- Locate your water meter (usually at property boundary, in footpath or front garden under cover)
- Turn off all water-using appliances—washing machine, dishwasher, boilers, everything
- Make sure nobody uses taps, toilets, or showers during test
- Note the meter reading precisely—photograph it with timestamp
- Wait 30-60 minutes without using any water
- Check meter again—if reading's increased, you have a leak somewhere
- For small leaks, leave overnight and check in morning
The speed of meter movement tells you leak severity. Spinning dial means significant leak losing 50+ litres hourly. Slow creep suggests pinhole leak around 5-10 litres per hour. Either way, it needs investigating. If you've noticed unusually high water bills with no visible leak, this test confirms whether water's escaping somewhere on your property.
The Stop Tap Test for Leaks
This clever test determines whether your leak's on the underground mains supply or inside the property. Essential information before you start calling people.
- Turn off your internal stopcock (usually under kitchen sink—see our guide on how to find your water shut-off valve)
- Open a tap to drain system—water should stop flowing once stopcock's fully closed
- Check water meter reading and note it down
- Wait 2-3 hours without using water
- Check meter again
If the meter's moved, water's still passing through but not reaching your internal stopcock. That definitively places the leak between meter and stopcock—your underground mains supply pipe. If meter's static, leak's inside the property past your stopcock. For guidance on internal leaks, see our guide on how to find a hidden water leak in your house.
Professional Methods to Detect Leaks in Mains Water Supply Lines
Right, here's where proper leak detection begins. Each method has specific applications, and we often use multiple techniques to confirm leak location accurately.
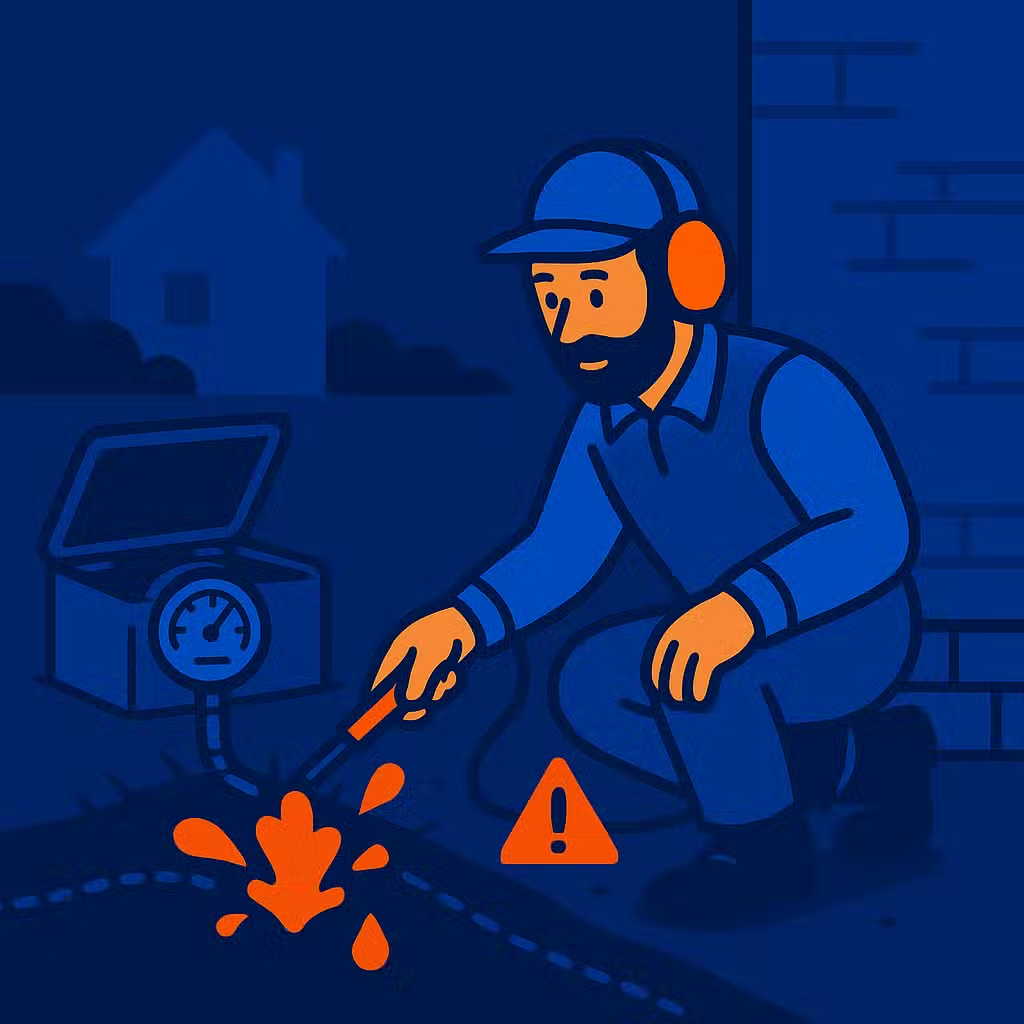
1. Acoustic Leak Detection Methods
How it works: Water escaping under pressure creates vibrations—typically 500-1500Hz for metal pipes, 70-850Hz for plastic. Ground microphones amplify these sounds up to 100 times.
Best for: Pressurised mains pipes, metal pipework, pipes under gardens or soft ground
Accuracy: 30cm-1m depending on soil conditions and pipe depth
Limitations: Needs water pressure, struggles with very deep pipes (2m+), affected by background noise
2. Tracer Gas Leak Detection
How it works: Safe hydrogen/nitrogen mix (95:5 ratio) injected into isolated pipe section. Gas escapes at leak point and rises through soil. Detector sniffs it out at surface.
Best for: Non-pressurised systems, plastic pipes, deep leaks, pipes under concrete/tarmac
Accuracy: 10cm-50cm depending on depth and soil type
Limitations: Requires pipe isolation, not suitable for active water flow, weather-dependent
3. Thermal Imaging Leak Detection
How it works: Infrared cameras detect temperature differences. Escaping water creates cold spots (mains supply) or warm spots (heating pipes). Temperature variance shows on screen.
Best for: Shallow leaks, slab leaks, large volume escapes, confirming acoustic findings
Accuracy: Shows general area, needs confirmation with other methods
Limitations: Weather dependent, surface temperature affects readings, can't penetrate deep
4. Pressure Testing Water Pipes
How it works: Isolated pipe section pressurised with air or water. Gauges measure pressure drop over time. Drop rate indicates leak severity and helps locate general area.
Best for: Confirming leak presence, measuring leak size, post-repair verification
Accuracy: Confirms leak exists but doesn't pinpoint location
Limitations: Diagnostic only—needs follow-up with location methods
Acoustic Leak Detection Methods Explained
After thirty years using ground microphones, I can tell you acoustic detection is both art and science. The equipment's sophisticated, but interpreting sounds takes experience. For detailed information, see our complete guide on acoustic leak detection technology.

What We're Actually Listening For
Different leak types create distinct sounds. High-pressure pinhole leaks produce a sharp hiss—like a distant kettle whistling. Joint failures create rhythmic thumping as water pulses through the gap. Crack leaks generate a hollow whooshing sound.
Soil type affects transmission. Cornwall's granite transmits sound brilliantly—I've tracked leaks 50 metres from source. Devon's clay dampens vibration, making detection trickier but still effective with the right frequency filters.
Modern acoustic equipment includes correlation technology. We place sensors at two points on the pipe—say, at your stopcock and external stop valve. The leak creates sound travelling to both sensors at known speed. Software calculates exact leak position based on time difference. Incredibly accurate on long pipe runs.
Tracer Gas Detection for Underground Leaks
When acoustic methods can't penetrate—pipes too deep, under concrete, or in waterlogged ground—tracer gas saves the day. The process is straightforward but requires specific conditions:
- Pipe isolation: We close valves to create sealed section containing leak
- Water removal: Drain or blow out water from isolated section
- Gas injection: Introduce hydrogen/nitrogen mix at controlled pressure
- Waiting period: Gas finds leak and rises through soil (5-30 minutes)
- Surface detection: Walk pipe route with sensor, detecting gas escape at leak point
The beauty of tracer gas? It works where nothing else can. When people wonder how to find water leaks buried underground, this is often the answer. I've found leaks 2 metres deep under driveways using this method. The gas is completely safe—even with a naked flame, the hydrogen concentration's too low to ignite. Learn more about our tracer gas leak detection services.
Thermal Imaging for Water Supply Pipe Leak Detection
Thermal cameras aren't magic, but they're remarkable when used correctly. Water escaping from mains creates temperature differentials—typically 2-5°C different from surrounding soil. Our FLIR cameras display this as colour gradients.
Best results come early morning or late evening when ambient temperature's stable. Midday sun heating surfaces masks subtle temperature changes from leaks. Weather matters too—thermal imaging struggles after heavy rain when everything's wet and cold.
We use thermal imaging as confirmation rather than primary detection. Acoustic or tracer gas narrows location; thermal imaging provides visual proof before we mark up for excavation. It's particularly brilliant for slab leak detection where water seeps under concrete floors. Our thermal imaging leak detection service combines this technology with other methods for comprehensive investigation.
Choosing the Right Detection Method
Not every leak needs every method. Here's how we decide which techniques to deploy based on your specific situation.
| Situation | Best Primary Method | Confirmation Method | Why This Combination |
|---|---|---|---|
| Mains pipe under lawn | Acoustic detection | Thermal imaging | Soft ground transmits sound well; thermal confirms before digging |
| Under driveway/patio | Tracer gas | Correlation acoustics | Gas penetrates hard surfaces; acoustics check if multiple leaks |
| Deep burial (1.5m+) | Tracer gas | Pressure test zones | Gas rises from depth; pressure narrows search area |
| Lead pipe suspected | Visual inspection + acoustic | Tracer gas if needed | Lead often shows surface corrosion; acoustic finds holes |
| Shared supply pipe | Correlation acoustics | Isolation testing | Pinpoints which property's section; avoids neighbour disputes |
| Post-repair check | Pressure test | Meter monitoring | Proves fix worked; meter confirms no other leaks |
UK-Specific Considerations for Mains Leak Detection
British properties present unique challenges that affect detection methods. Understanding these helps explain why professional leak detection specialists use different approaches here versus, say, the US or Australia.
Hard Water Impact on Detection
Most of Cornwall and Devon sits in hard water territory. Over decades, limescale builds inside pipes—particularly in lead and iron mains. This creates two problems:
First, internal diameter reduces. A 22mm pipe might be effectively 15mm after fifty years of scale buildup. Higher pressure means louder leak sounds—actually helps acoustic detection. But it also means more frequent joint failures where scale-blocked pipes create pressure points.
Second, scale can mask small leaks temporarily. Customer calls saying "leak just started" but find pipe's been weeping for months—scale plug finally gave way. Always worth checking moisture meter readings around suspected leak areas to identify long-term dampness.
Victorian and Georgian Property Challenges
Cornwall's rich in beautiful old properties. Plumbing's often original or mixture of ancient and modern—nightmare for leak detection. I've traced mains supplies following random routes around gardens because they were laid when property boundaries were different.
Pre-1970 properties likely have lead pipe somewhere in the supply chain. Lead's soft, corrodes internally, develops pinhole leaks that are incredibly difficult to locate without tracer gas. If your property was built before 1970 and you've not replaced your mains, budget for full replacement not repair. Patching one leak means another appears six months later.
Soil Conditions Affecting Detection
Cornwall's granite and Devon's clay require different detection approaches. Granite transmits acoustic signals brilliantly but makes excavation expensive. Clay dampens sound but it's easier to dig.
Coastal properties face salt corrosion. Pipes corrode faster, particularly metal fittings. External stop valves seize more frequently. I always recommend annual operation test of stopcocks in coastal areas—turn them off and on to keep them free.
Waterlogged winter ground affects thermal imaging—everything's cold and wet, masking leak temperature signatures. Spring and autumn provide best thermal detection conditions in the South West.
Professional Detection Process Step-by-Step
When you call specialists like us for mains water leak detection, here's exactly what happens. Understanding the process helps you prepare and know what to expect.
Complete Professional Leak Detection Process
- Initial consultation: Phone discussion about symptoms—high bills, wet patches, pressure drops
- Site survey: Visit to assess property, locate external stop valve, check meter accessibility
- Desktop research: Check water company records for known pipe routes and past repairs
- Confirmation tests: Meter test and stop tap test to verify leak location
- Primary detection: Deploy most suitable method—typically start with acoustic scanning
- Leak marking: Spray paint or marker flags showing leak location within 30cm-1m
- Depth assessment: Use pipe locators to determine how deep before excavation
- Reporting: Detailed report with photos, thermal images, exact measurements for repairs
- Repair coordination: Either fix ourselves or provide documentation for your plumber
- Post-repair verification: Follow-up pressure test to confirm leak's actually fixed
The entire detection process typically takes 2-4 hours for residential mains leaks. Complex situations—shared supplies, multiple leaks, very deep pipes—might take longer. We always provide realistic timeframes upfront.
What We Need From You
Preparation speeds up detection significantly. Before our visit:
- Locate and provide access to water meter and external stop valve
- Clear access routes to suspected leak areas
- Provide recent water bills showing consumption increase
- Inform neighbours if we'll need access to shared pipe sections
- Secure pets—detection equipment gets their attention
- Note any recent groundworks near pipe route
When DIY Stops and Professional Help Starts
Look, I respect DIY efforts—many homeowners successfully identify general leak areas using meter tests. But there's a clear line between helpful investigation and expensive mistakes.
- Digging exploratory holes hoping to find leak—you'll damage good pipe and still miss the leak
- Attempting to pressure test with shop-bought equipment—industrial gauges needed for accuracy
- Pouring dye down stopcock "to trace pipes"—dye doesn't show underground leaks
- Using £20 moisture meters claiming to find buried pipes—they detect surface moisture only
- Hiring consumer-grade metal detectors—they find the pipe but not the leak on it
Call professionals when:
- Meter test confirms leak but you can't find visible evidence
- Multiple wet patches suggest complex leak pattern
- Leak's under hard surfaces (drives, patios, buildings)
- Insurance claim requires trace and access documentation
- Previous repair attempts haven't resolved problem
- Shared supply pipe causing neighbour disputes
Cost Implications of Undetected Mains Leaks
Let's talk numbers, because this is where the real impact hits. Delayed detection doesn't just waste water—it multiplies damage exponentially.
Water Waste and Bill Impact
A pinhole leak (2mm) in a mains pipe loses approximately 150 litres daily at typical UK mains pressure (2-4 bar). Over a year, that's 54,750 litres. At average metered rates (£2.50 per cubic metre including wastewater), you're paying £137 annually for water literally disappearing into your garden.
Medium leaks (5mm crack) lose 500+ litres daily. That's £456 yearly wasted. Burst joints can lose 2,000 litres daily—£1,825 annually just evaporating into soil. These aren't worst-case figures; they're typical from our casework.
Property Damage from Delayed Detection
Water doesn't just disappear—it goes somewhere and causes damage en route:
- Foundation erosion: Soil washout under foundations creates voids. Minor settlement cracks appear first, then serious subsidence. Repair costs £3,000-£15,000 depending on severity
- Driveway/patio collapse: Water undermines hardcore base. Surface sinks or cracks. Full replacement often necessary: £2,000-£6,000
- Garden damage: Waterlogged soil kills plants, creates bog conditions. Landscaping repairs: £500-£2,000
- Internal damp: Water tracking along pipe routes into buildings. Damp-proofing and decoration: £1,500-£5,000
- Structural issues: In worst cases, wall movement and serious cracks. Underpinning: £10,000-£50,000
These aren't scare figures—they're insurance claim values from properties we've investigated. The pattern's always similar: initial leak ignored, problem escalates, damage multiplies.
Insurance Considerations
Most buildings insurance covers trace and access for detecting leaks plus escape of water damage. But there are catches worth understanding before you claim.
Trace and access coverage typically includes:
- Professional leak detection fees (limits vary, usually £5,000-£10,000)
- Opening and closing floors, walls, or ground to access leak
- Making good decorative finishes after repair
- Damage caused by water escape (separate coverage from trace and access)
What's not covered:
- The leaking pipe repair itself—that's maintenance, not insurable damage
- Gradual leaks you should've noticed—insurers expect reasonable vigilance
- Leaks from poor maintenance or wear and tear
- Damage from leaks outside your property boundary (water company's issue)
Preventing Mains Water Supply Leaks
While you can't prevent all leaks, several practical measures reduce risk significantly. Based on three decades investigating failures, here's what actually works.
Effective Prevention Strategies
- Annual stopcock operation: Turn off and on once yearly to prevent seizure
- Pressure monitoring: Check mains pressure annually—excessive pressure (above 4 bar) stresses pipes
- Meter reading routine: Monthly meter readings spot gradual increases indicating developing leaks
- Ground movement awareness: After heavy rain or drought, check for ground settlement near pipe routes
- Avoid groundwork near pipes: Consult water company records before digging—hitting mains causes instant massive leaks
- Tree root management: Keep vigorous trees (willows, poplars) away from mains routes—roots seek water and crack pipes
- Pipe material assessment: If your property's pre-1980 and never replaced mains, budget for eventual renewal
When to Consider Preventive Replacement
Sometimes replacement beats reactive repairs. Consider full mains renewal if:
- Lead pipe present anywhere in system (health risk plus failure risk)
- Multiple leaks within 5 years—indicates general pipe failure
- Original pipe's 50+ years old, particularly iron or early copper
- Planning major groundwork anyway (new drive, extension)—replace whilst ground's open
- Insurance premiums increasing due to repeated claims
Modern blue MDPE pipe lasts 50+ years and resists corrosion brilliantly. Installation using moling (directional drilling) minimises surface disruption. Costs vary but expect £1,500-£3,000 for typical 15-20 metre domestic supply replacement—often cheaper than multiple repair cycles.
Emergency Leak Response: What to Do Right Now
If you've got water actively flooding from a burst mains pipe, here's your immediate action plan. Time matters—every minute adds damage.
Immediate Emergency Actions
- Turn off external stop valve: Usually in footpath or garden near boundary. Turn clockwise until fully closed
- If you can't access external valve: Call water company emergency line—they'll send someone to close it
- Turn off electricity: If water's entering building near electrics, isolate at consumer unit
- Move valuables: Get items away from water path—damage spreads fast
- Document everything: Photos and videos for insurance, including meter reading showing loss
- Contain if possible: Sandbags, towels, anything to divert water from buildings
- Call emergency plumber: For visible burst requiring immediate repair
- Notify insurer: Within 24 hours for escape of water claims
Don't attempt DIY repairs on mains pipes under pressure—1 bar (UK typical) equals 14.5 PSI, enough to cause serious injury if fittings fail. Wait for professionals with proper equipment.
For less urgent situations—slow leaks, suspected issues, wet patches—our detection service identifies problems before they become emergencies. Prevention's always cheaper than crisis management.
Mains Leak Draining Your Wallet?
Our non-invasive detection methods locate water leaks in main pipe supply systems accurately—typically within 30cm—without unnecessary excavation. Using acoustic technology, tracer gas, and thermal imaging, we'll find your leak fast and provide the documentation needed for insurance claims.
Get Professional Leak DetectionCall 07822 025 911 for immediate advice
UK Water Regulations and Legal Requirements
Understanding your legal obligations regarding mains water supply leaks matters—both for compliance and avoiding fines.
Water Supply (Water Fittings) Regulations 1999
These regulations make property owners responsible for maintaining supply pipes on their property. Key requirements include:
- Supply pipes must not waste water through leaks or otherwise
- Stop valves must be accessible and operable
- Repairs must comply with Water Regulations Advisory Scheme (WRAS) standards
- Contamination prevention—backflow devices required in certain situations
Failure to fix leaks can result in enforcement notices from water companies. Continued non-compliance risks fines up to £1,000. Intentional water wastage through negligence is actually a criminal offence under these regulations.
Building Regulations Part G
If you're replacing mains supply pipe, work must comply with Building Regulations Part G (Sanitation, Hot Water Safety and Water Efficiency). This includes:
- Minimum pipe sizes for flow rates
- Backflow prevention requirements
- Pipe materials meeting British Standards
- Frost protection for external pipework
Competent person schemes allow registered plumbers to self-certify compliance. Otherwise, Building Control notification's required before work starts.
South West Water Specific Requirements
As most Cornwall and Devon properties fall under South West Water territory, their specific requirements matter:
- External stop valve location must be recorded with water company
- Meter protection required in frost-prone areas
- Written consent needed before connecting to mains for new supplies
- Leak allowances available on metered supplies (up to 3 years' worth in some cases)
For guidance specific to South West Water notifications, see our article on what to do when South West Water says you have a leak.
Latest Advances in Leak Detection Technology
Detection methods continue evolving. While acoustic and tracer gas remain industry standards, emerging technologies show promise for future applications.
Satellite Leak Detection
Satellite technology using synthetic aperture radar can detect soil moisture changes from space. Currently used by water companies for network monitoring, it's less practical for individual property investigation due to resolution limitations. Works brilliantly for finding major mains leaks across wide areas but can't pinpoint domestic pipe issues with sufficient accuracy.
AI-Enhanced Acoustic Analysis
Modern correlation software now includes machine learning algorithms that distinguish leak sounds from background noise more effectively. We've been testing systems that "learn" typical leak signatures, improving accuracy especially in noisy urban environments.
Smart Meter Integration
New smart water meters provide hourly consumption data, highlighting unusual patterns immediately. Some systems send alerts when nighttime flow (when household should be zero) indicates leaks. Not a detection method per se, but brilliant for early warning.
Ground Penetrating Radar
GPR locates buried pipes and can sometimes identify void spaces from water erosion. Limited for actual leak location but excellent for pipe tracing when records are incomplete. We use it occasionally on complex sites where pipe routes are unknown.
Making Sense of Mains Leak Detection Methods
After thirty years pointing various gadgets at underground pipes, I can tell you this: successful leak detection isn't about having the fanciest equipment—it's about knowing which method suits which situation and interpreting results correctly.
The methods to detect leaks in mains water supply lines we've covered work. Acoustic detection finds most pressurised leaks efficiently. Tracer gas succeeds where acoustics can't penetrate. Thermal imaging provides visual confirmation. Our comprehensive pressure and leak testing services verify repairs. Combined systematically, they locate water leaks in main pipe supply accurately whilst minimising property damage.
Remember these key takeaways:
- Start with DIY tests: Meter and stop tap tests confirm leak existence before spending on detection
- Match method to situation: Different techniques work better for different scenarios—consult professionals for guidance
- Act quickly: Every day of delay multiplies water waste and damage costs
- Don't excavate blindly: Professional detection saves thousands in unnecessary digging and property damage
- Document everything: Photos, meter readings, and professional reports essential for insurance claims
- Consider full replacement: Sometimes renewing entire supply pipe beats repeated repairs
- Know your responsibilities: Understanding boundary between your pipe and water company's prevents billing surprises
Modern leak detection methods mean we can find your mains water leak without destroying your property. That's not magic—it's physics, experience, and the right equipment applied systematically. The technology's transformed since I started in this industry, but the principle remains simple: find it accurately, mark it precisely, fix it properly.